Showing posts with label qayg. Show all posts

Monday, March 15, 2021

Homebody Favorites!

Hello and Happy Monday! Since I so enjoyed writing my last post about the nine patch sister quilts that Sharon Holland and I made, along with sharing the free Charming Nine pdf pattern so you can make your own, I decided I'd pop back in today with a long overdue Homebody favorites post!

Homebody Banner

Homebody Bundle

Homebody Bundle

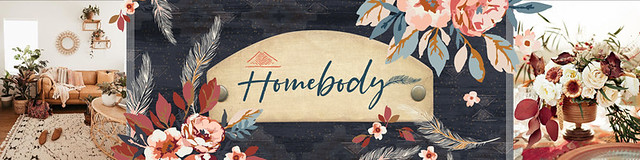
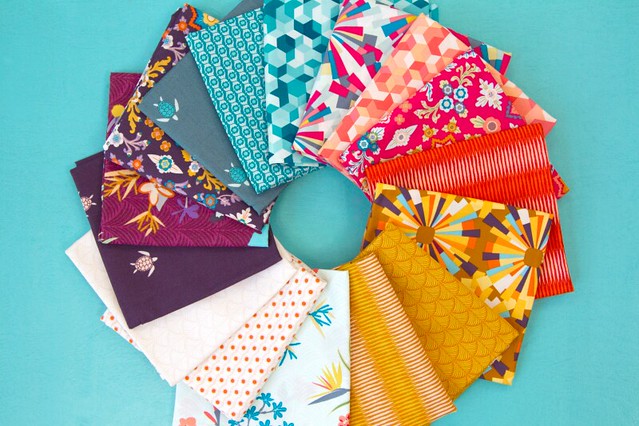
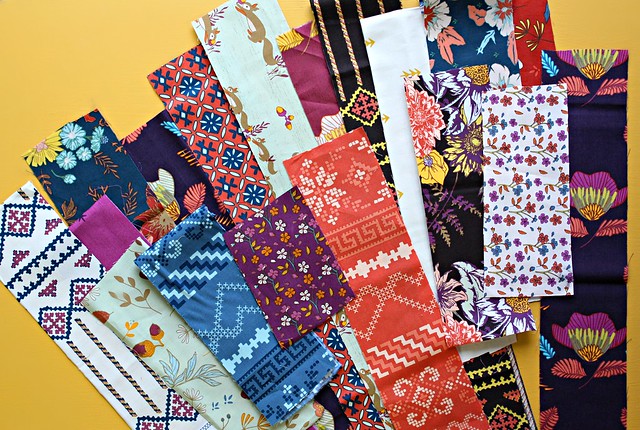
Homebody is my latest and thirteenth collection to date with fabric manufacturing company, Art Gallery Fabrics. This sixteen piece collection at its core, celebrates the unspoken magic of being home! The concept and artwork for Homebody was created and submitted to AGF long before we were all "stuck" in our homes these past 365 days, so the somewhat ironic timing will always be something I particularly treasure and laugh about when it comes to this collection. For me, home means creating a cozy space with a calm, peaceful environment that nourishes and comforts. These designs full of cheerful florals, cozy feathers, boho blenders and soft textures colored in a pretty palette reveals exactly the style of our own home and the layers of prints, patterns and things we've collected over the years that have made our house a home. Homebody has been amazing to sew with these past several weeks, from small accessory projects to large quilts. You can find loads of inspiration in the the LookBook, a 68-page book filled with beautiful pictures and amazing projects, and today I thought I'd share some of my favorites!

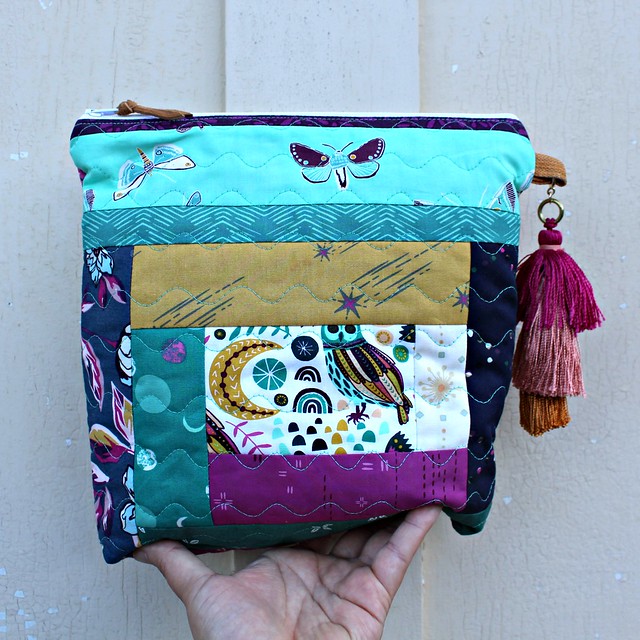
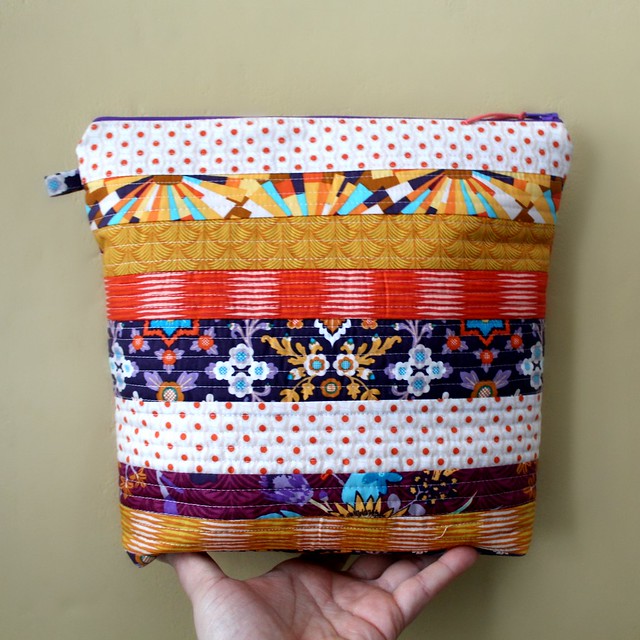
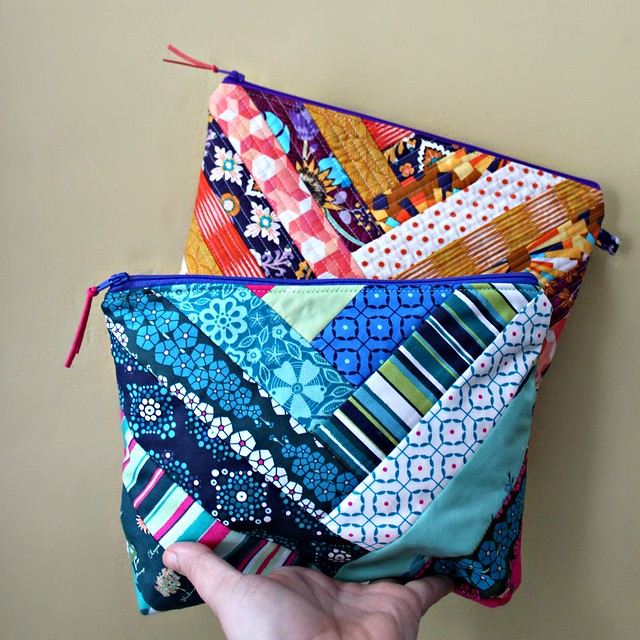
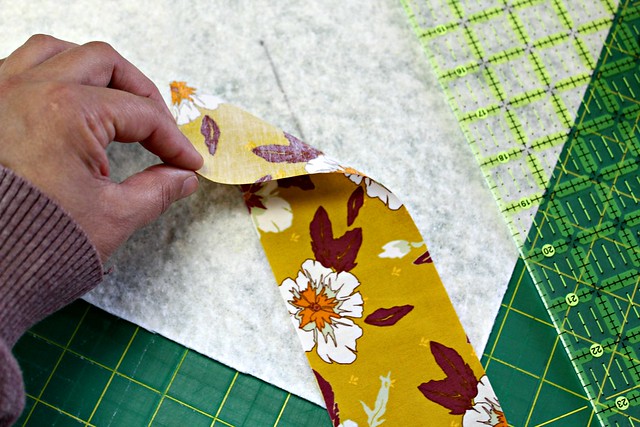
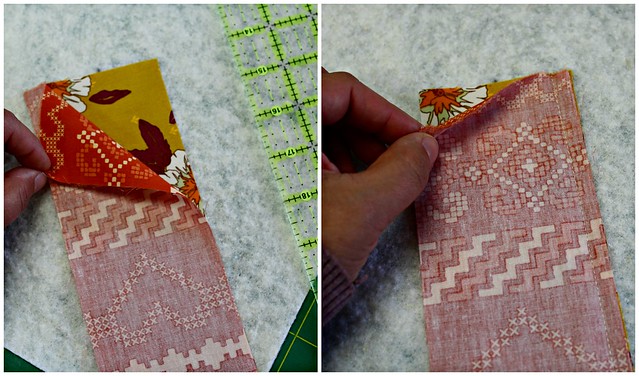
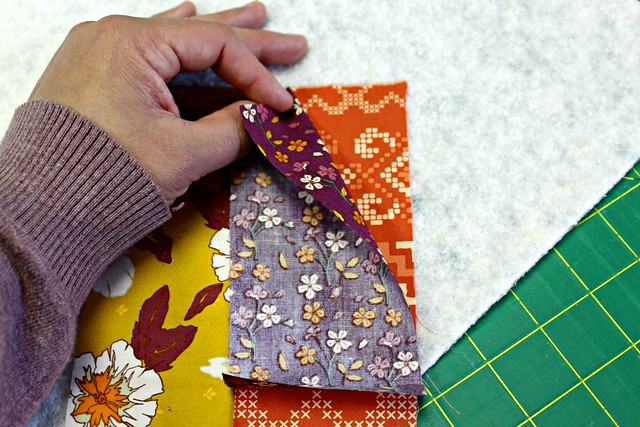
I'm going to start with what I made as soon as my Homebody rolls arrived, this set of quilted cosmetic bags for my daughter and I to showcase some of the main florals in this new collection! Everything I've learned about making bags I've learned from Svetlana of sotakhandmade, so if you're looking to make something similar I suggest her Essential Pouch pattern. To make these extra lux I used two layers of Hobbs Tuscany silk batting, just scraps I had leftover from some previously made quilted pillows, and the two layers quilted with a combination of the straight stitch + the wavy stitch created such amazing quilty texture on these!

CosmeticBags9

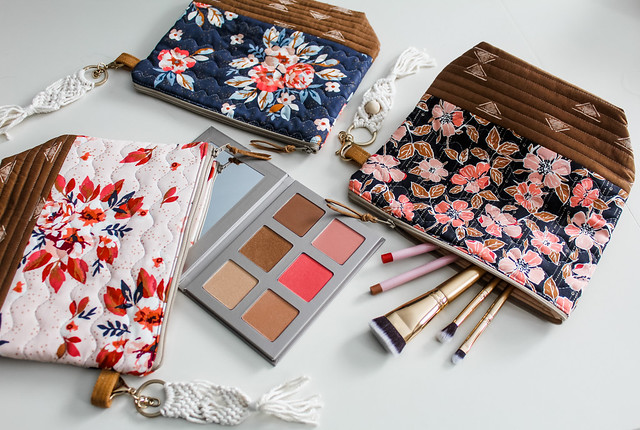
One of my favorite things when it comes to bag-making is shopping for unique tassel pulls and fun keychains to add. I found these amazing macrame keychains on amazon recently and they look so perfect with the boho style of Homebody!

CosmeticBags3

Next up are some Homebody pillows! I made quite a lot and I have some that I haven't even photographed to share yet. I included the one in Fridays post that started my new nine patch obsession, but here's a second 18" pillow that's very similar, using the same nine patch pattern just without the binding. Again I used two layers of Hobbs Tuscany Silk batting with dense straight line quilting in a light tan Aurifil thread for yummy, cozy quilty texture. 

Homebody Nine Patch Pillow

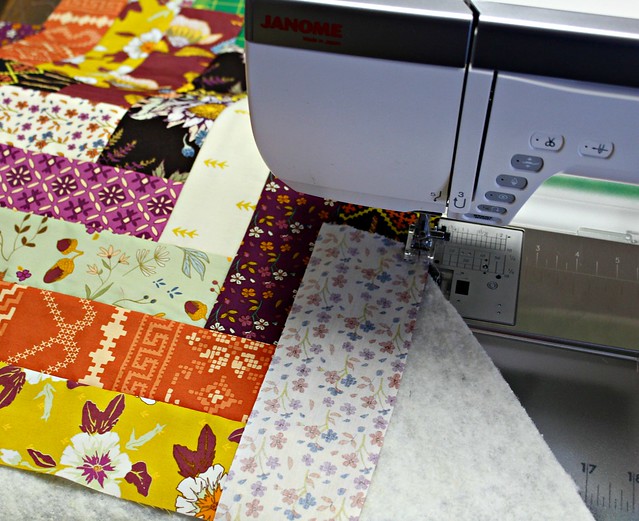
These pair of whole cloth quilted pillows I made for my LookBook to showcase the Homebody main florals -- Togetherness at Home (left) and Togetherness at Heart (right). A great tutorial for making your own whole cloth pillow covers can be found, again, at sotakhandmade. To quilt this pair I used a wavy stitch that comes built-in on my Janome that's become my first choice for quilting when I want something other than the straight stitch. I love it!

WholeClothPillowSet8

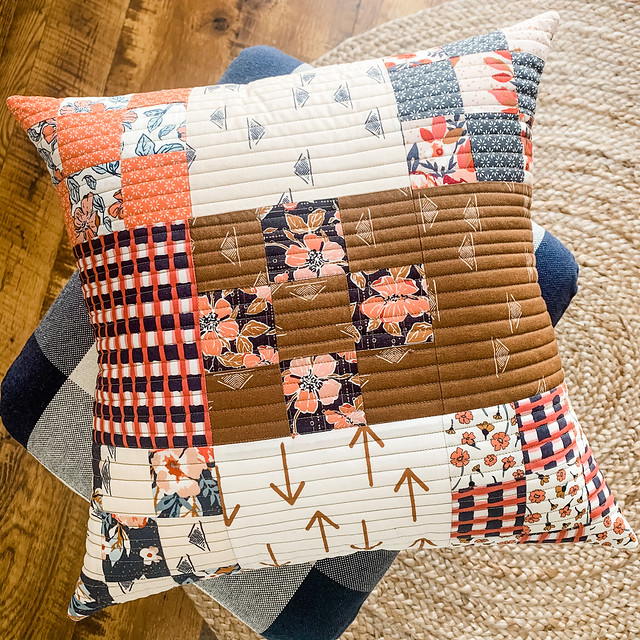
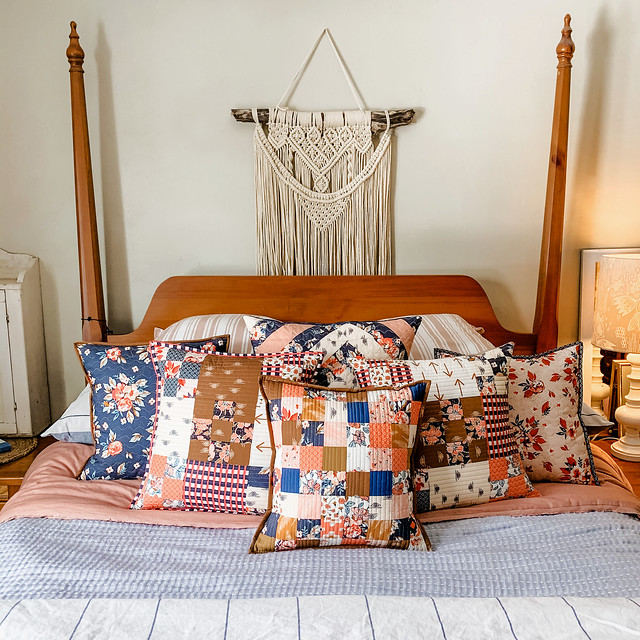
Patchwork pillows are always fun to make! This next one is made using 2.5" Homebody squares that I cut from scraps leftover from other projects. This is the first pillow I made to fill with a Hobbs Pillow Pal poly/down pillow insert. Hobbs Bonded Fibers has generously sponsored me with quilt batting over the past few years and recently sent me several of their pillow insert sizes to try out and folks, I promise you -- these are the absolute best I've tried! They have nearly twice the loft of the pillow inserts I previously purchased from Amazon and Joann over the years, which means they make for a very full pillow which in my opinion always looks and feels the best!

Homebody Patchwork Pillow

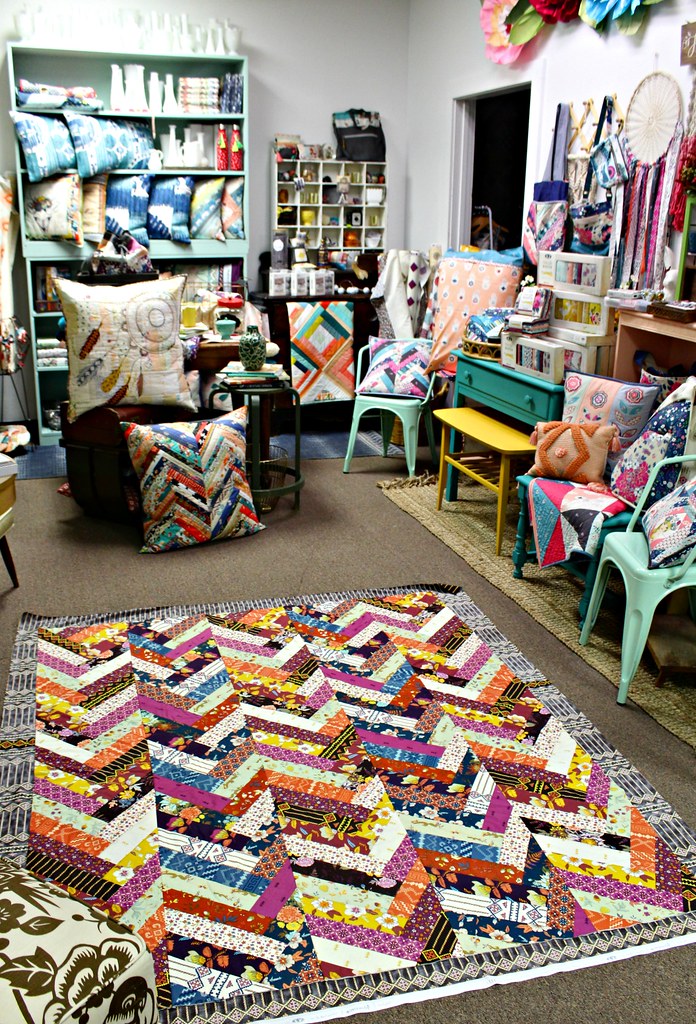
For the fun of it, since I'm still making things at home rather than my studio, I took my box of Homebody finished pillows that are eventually headed to the shop side of my studio and added them to our bed to snap some photos to share asking the question, how many pillows are too many? I'd love to know your thoughts on that!

Homebody Pillows

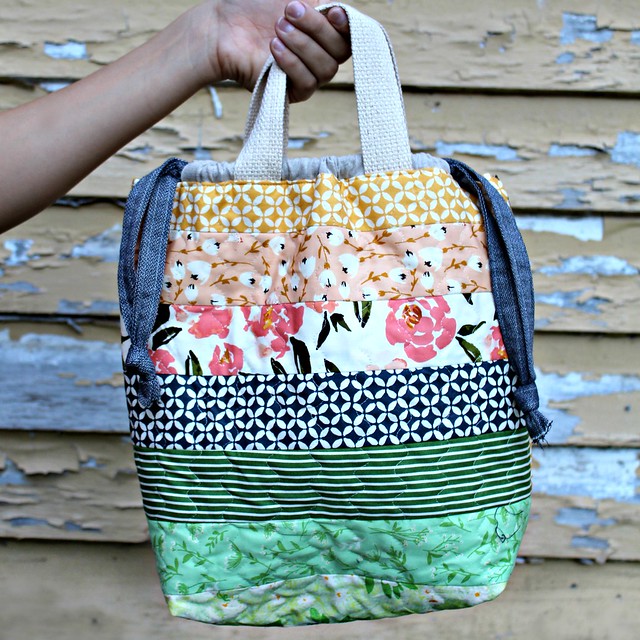
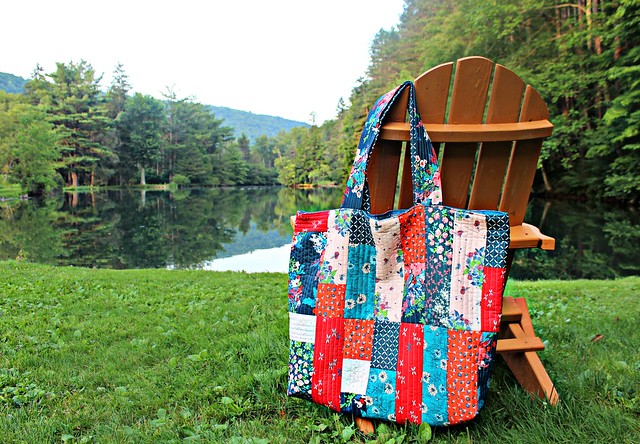
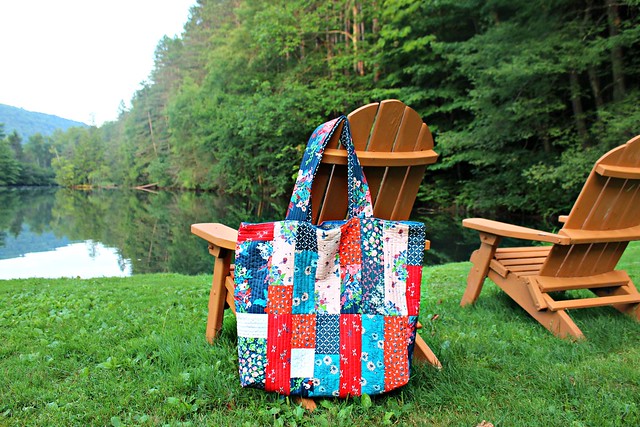
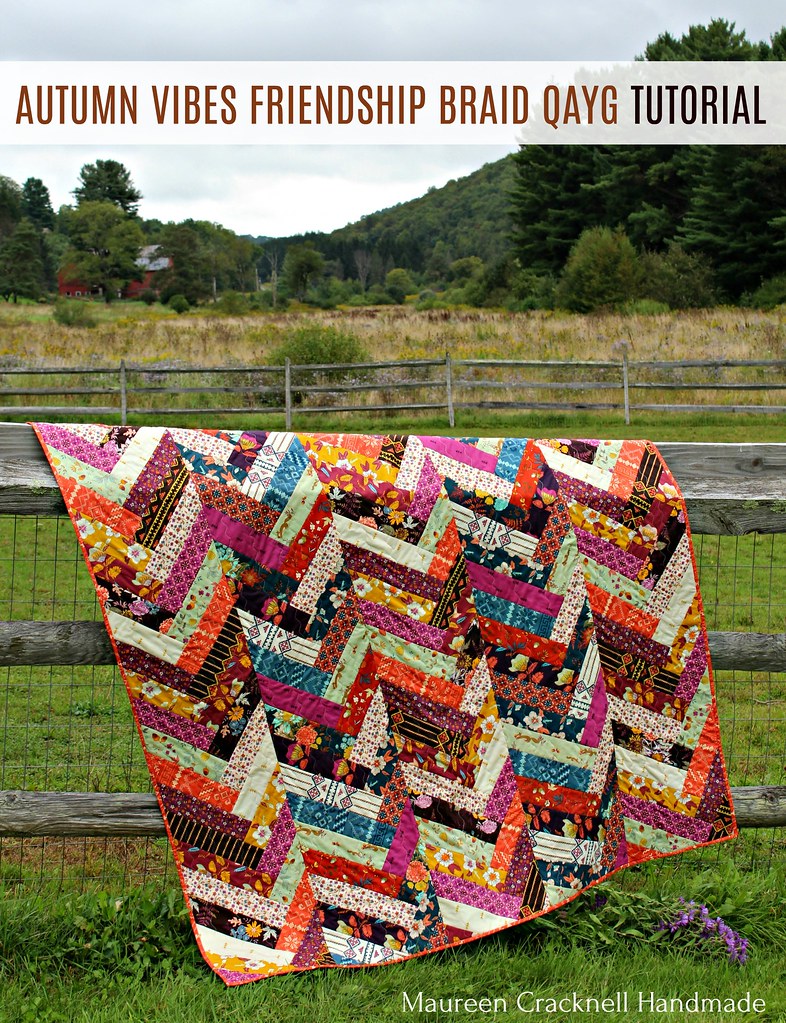
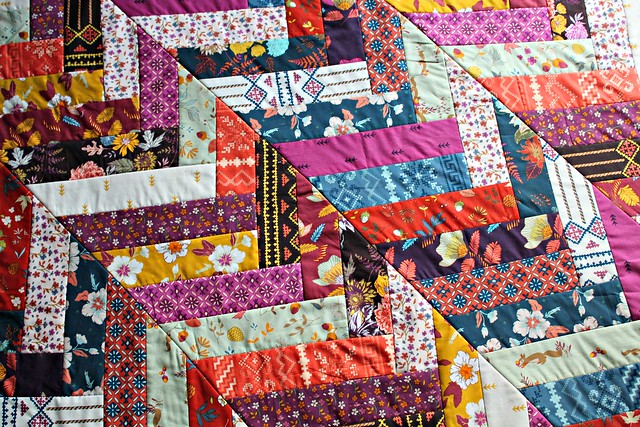
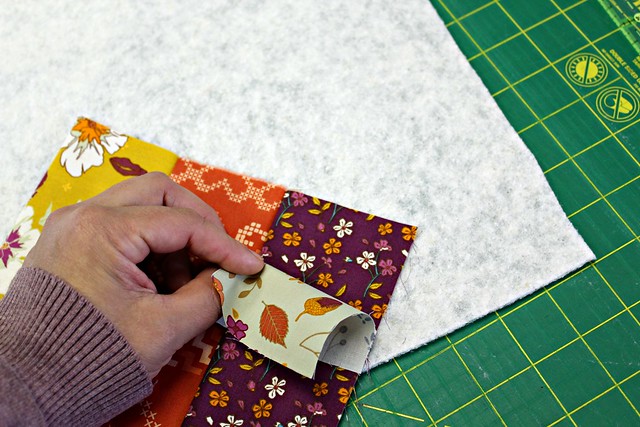
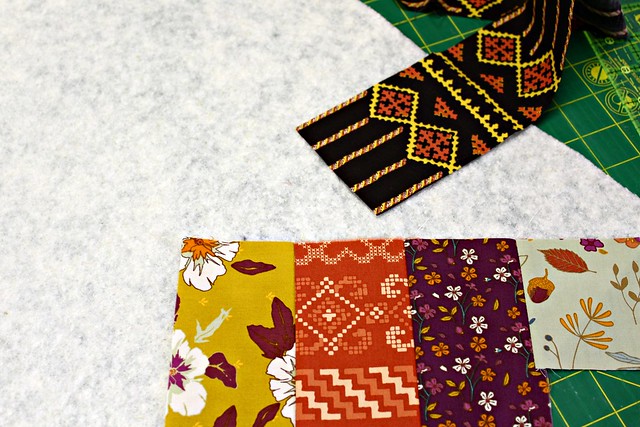
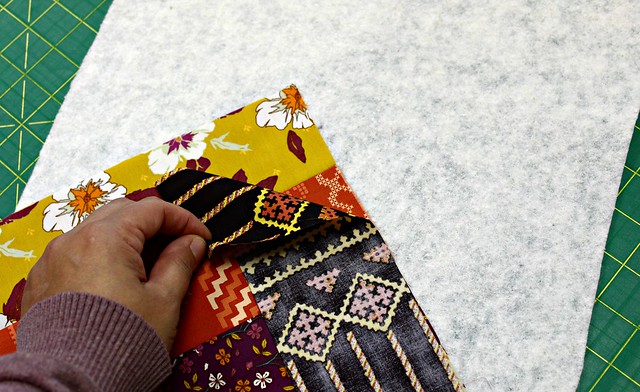
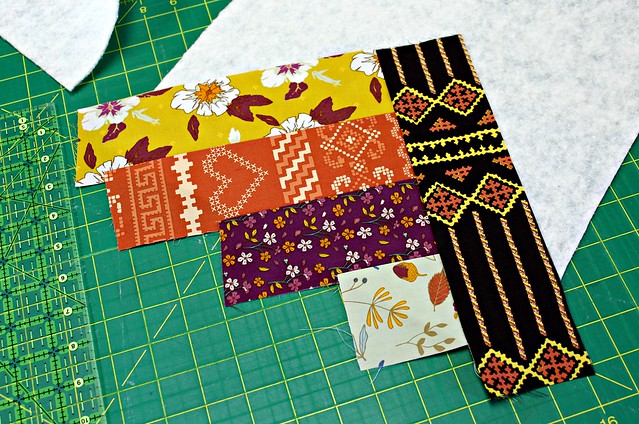
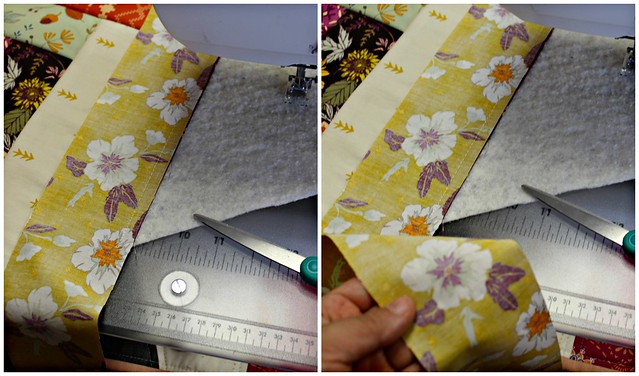
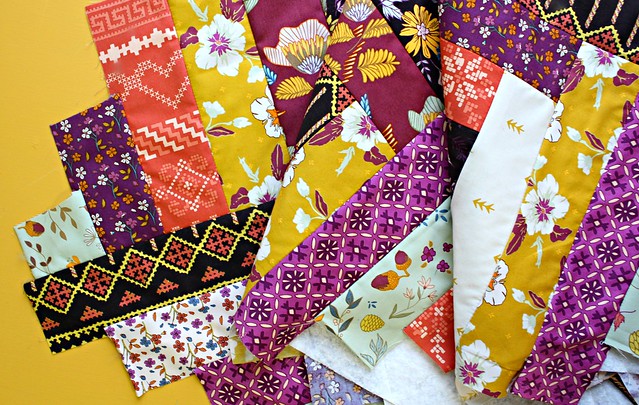
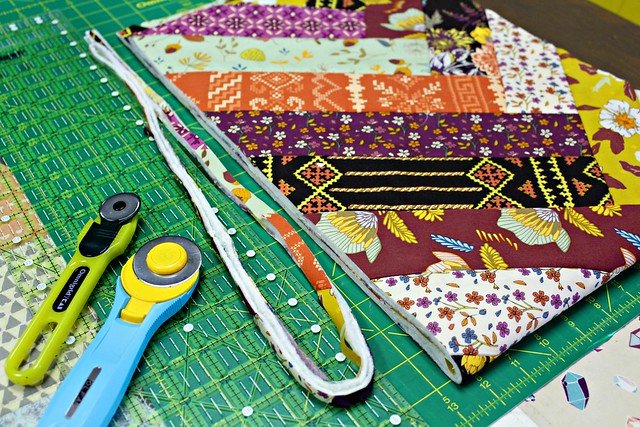
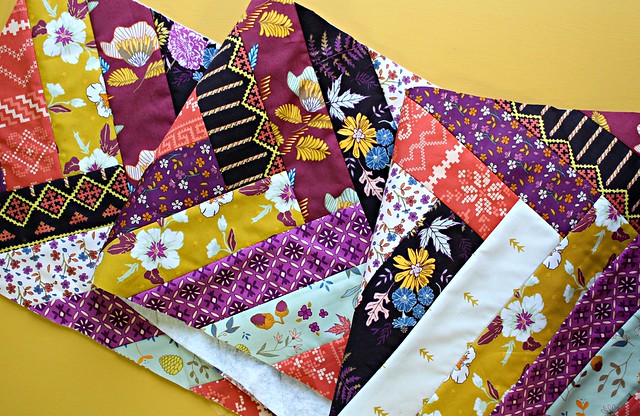
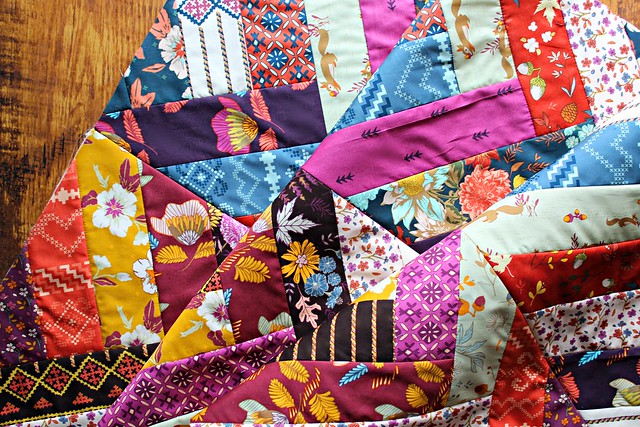
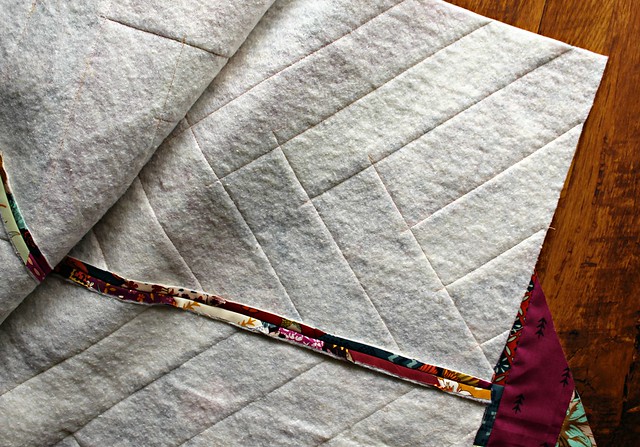
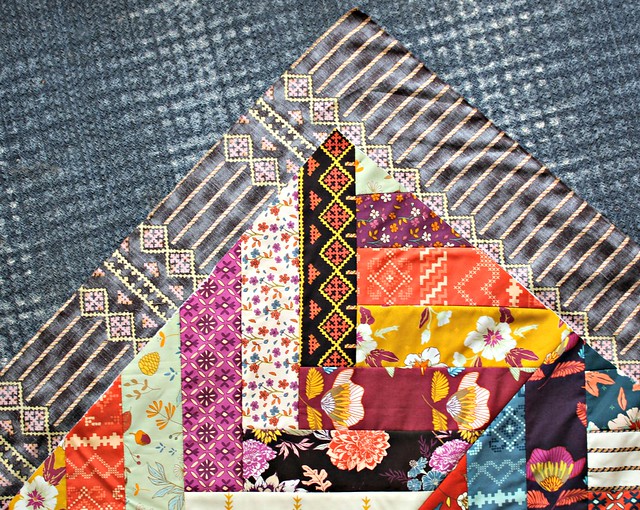
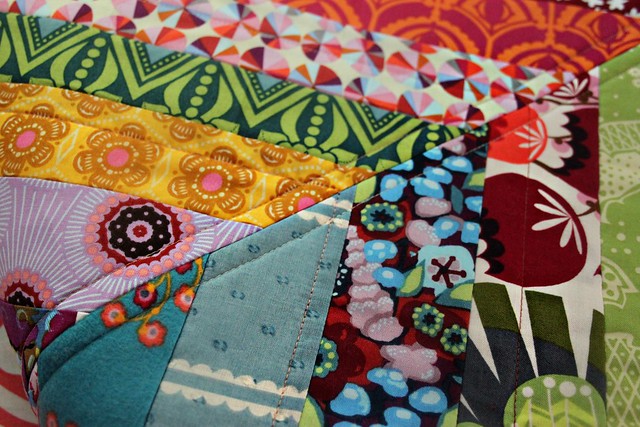
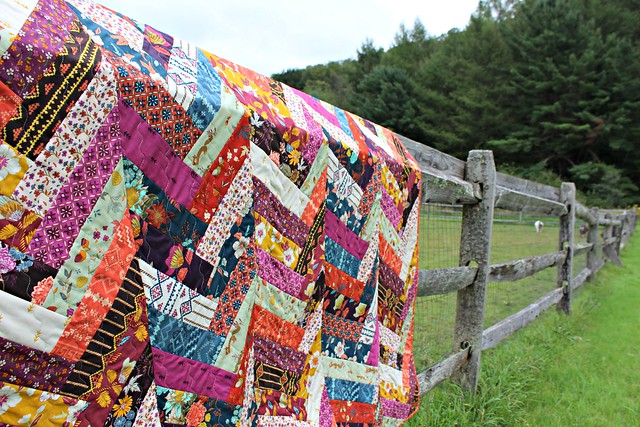
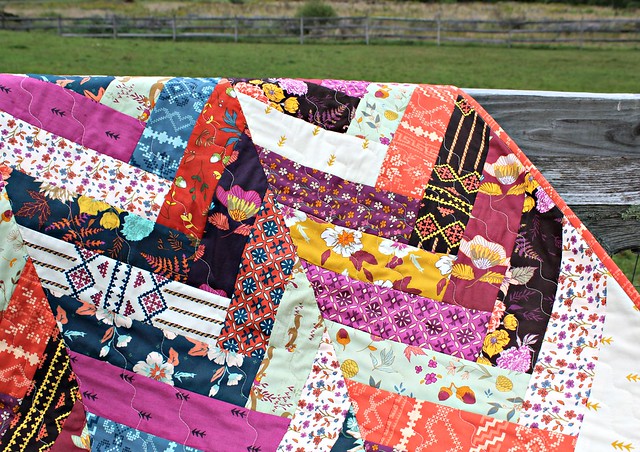
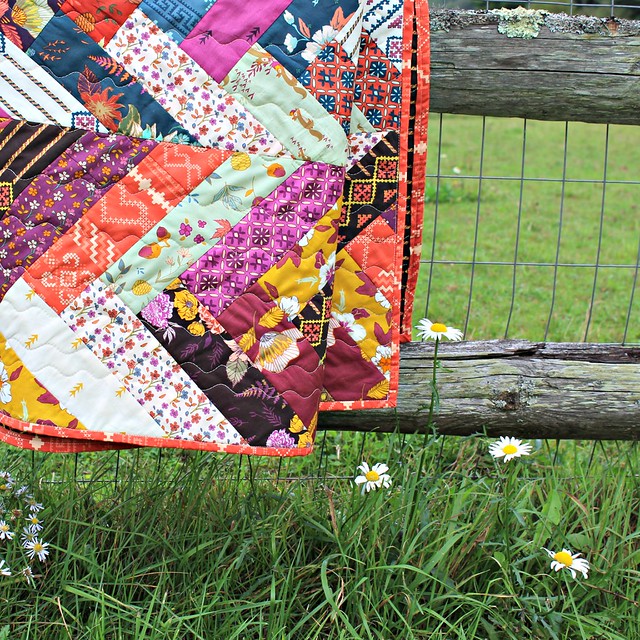
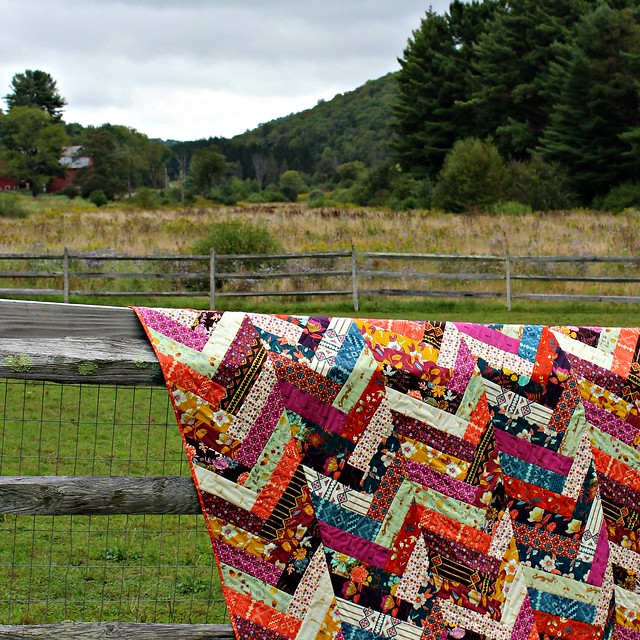
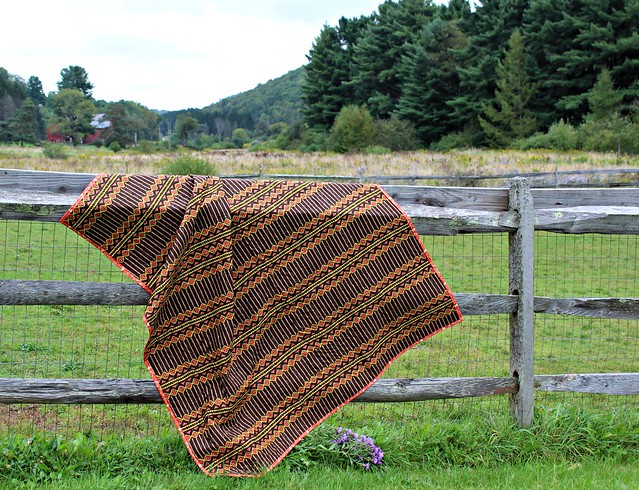
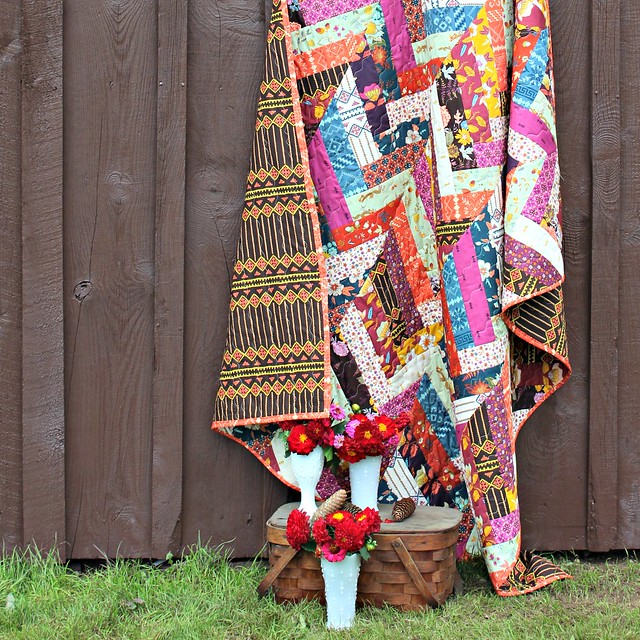
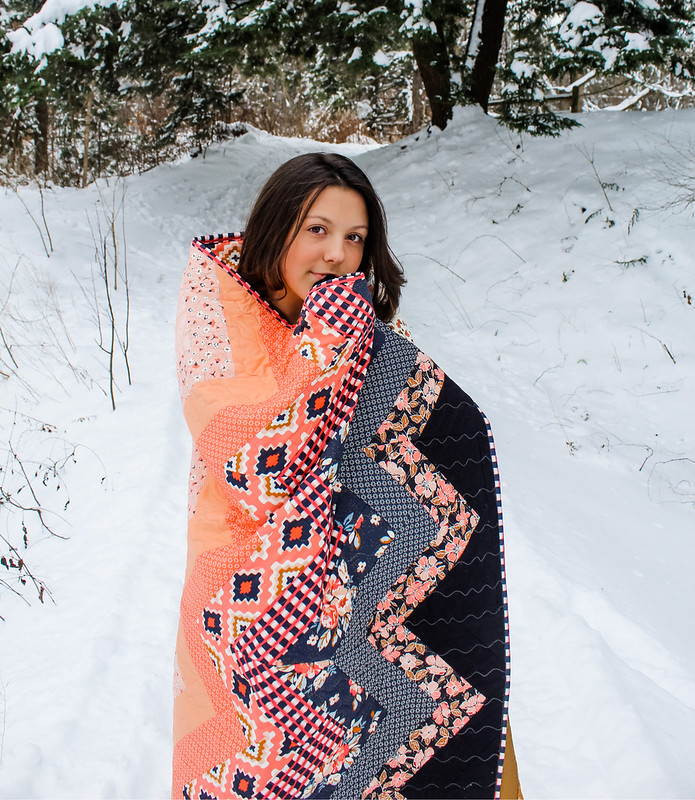
I've made four quilts/tops now that include Homebody, two are the Charming Nines that I shared on Friday so I'll start with my forever favorite go-to quilt to make, a Quick Quilt As You Go Herringbone QAYG quilt! I'm going to be completely honest and share that the near perfect way my fabrics lined up was a complete accident with this one. One of my favorite things about this pattern is that because of the way it's made, the fabric panels don't typically match up and istead the fabrics are staggered, creating a super scrappy zig zag effect that is all about having fun and not having to worry about perfectly matched points. Imagine my surprise when this was finished, trimmed and laid out that my panels nearly all lined up, minus the one part, well, I decided that was totally okay with me. What makes this quilt extra special is that for the LookBook my daughter Haila modeled the finished quilt!

Quilt6

Quilt2

Quilt9

Ever since Art Gallery Fabrics launched The Denim Studio line of smooth solid and printed denims I've wanted to make a classic star block quilt. I took this pic of my stashed denims in 2017 and as it would turn out, I was just waiting for Homebody to finally make my denim quilt! 

AGF Denim for Stockings

Using just two Homebody prints -- my Togetherness at Home floral as the star centers and Domestic Charm Birch as the background fabric, I pulled out my denims and started with just one block!  

Photo Feb 04, 12 19 56 PM

The Nectarine Sunrise Smooth Solid Denim is the only non blue denim I added because it's peachy pink color pairs perfectly with my floral. I used the Nectarine Sunrise denim to create an X within the repetitive star block pattern and I think it turned out so good. Using such a limited palette is not my typical choice when it comes to making quilts, but this truly turned out exactly how I had hoped it would all those years ago. when my denim star quilt was just a dream. 

Photo Feb 24, 12 46 12 PM

Photo Jan 01, 12 01 50 AM

The economy block centers of each star block yielded corner scraps that I immediately sewed into HSTs, so right after I had finished the quilt I had enough to make this matching pillow! 

Photo Feb 20, 11 14 08 AM

I think this pillow is a great place to stop today with my Homebody favorites! Of course I have tons more, but I think I'll save those for another day, soon. I hope these projects inspire you and that you love Homebody as much as I do!


xo Maureen

Wednesday, September 4, 2019

New Bags!

I 've mentioned before that this year started off rough with me badly injuring my right knee. In between my sprained ligaments healing and reconstruction surgery, there were a couple of weeks where I was able to sew, very slowly, and during that time I had challenged myself to try my best to make a bag a day. I came pretty close to that goal and it was just what I needed to stay creative and feeling somewhat productive. The bag challenge was helpful and I realized just how much I love to make them, which absolutely kept my spirits up during such a difficult time! The bags I make aren't very complicated, which makes them fun. Often times they're made from scraps leftover from larger projects which feels good to use, the construction is simple and they're always quilted. Today I thought I'd share a few of my recent quilted bag finishes!

IMG_9333

Inspired by tomorrow's Friday Fabric Giveaway with my new sponsor Fabric Stork for Alexandra Bordallo's adorable Dew & Moss collection for AGF, I pulled a few favorites from my Dew & Moss bundle and added in some colorful prints by Sharon Holland, Pat Bravo and Amy Sinibaldi to make a cheerful new drawstring bag!

IMG_9386

I love the way the photo of my fabric pull was arranged so much that I decided to keep the prints in the same order while piecing my bag. Such a pretty ombre effect, don't you think!? You may have seen the drawstring bag I shared last week made in this same style and I should let you know that I've decided to make at least six to display on a vintage accordion peg rack that I have in the shop side of my studio that I've been working on filling with inventory. Besides the zip bags I often make, I love making these non-zip, drawstring bags with handles!

IMG_9374

I still haven't sourced or made the perfect drawstrings just yet, but I'm getting closer! For these I used an AGF denim and finished the ends of them with Dritz Fray Check, to seals the unfinished ends of my drawstrings. When the Fray Check dries, which I left over night to dry after they were threaded through my bag, the ends harden slightly and think this may be the way I go from now on. I'll definitely keep you updated on that!

IMG_9377

The other three bags I made are zipper pouch bags using my Quick Quilt As You technique. This first one I shared on my Instagram yesterday and received lots of love! I've made several using this pattern that's a modified version of a qayg quilt block I made for my Craftsy (now Bluprint class). I love the combination of the flying geese with fabric strips. This is definitely a pattern I plan to make into a quilt!

IMG_9344

The back features prints from my Mystical Land and Nightfall collections combined with a few prints from the Lugu collection by Jessica Swift. I adore Jessica's moths and owls!

IMG_9347

The final two bags include many of the same fabrics but this time I used my Friendship Braid QAYG! Each strip is pieced and straight line quilted to a layer of Hobbs cotton batting with an aqua 50wt Aurifil thread that I finally just ran out of. I swear those large spools last forever!

IMG_9351

The back is just a simple striping of the same fabrics but this time I used a wavy stitch that comes as a built-in stitch on my Janome. I set the stitch length and width at the greatest options and it goes super quick and looks great!

IMG_9353

Now you'll all have to let me know which of these new bags is your favorite? It will help me decide which to make more of for my shop, which I really appreciate!

xo Maureen

Thursday, August 29, 2019

Sewing with The Open Road!

Have you seen Bonnie Christine's new collection for AGF, The Open Road? I've decided this is my most favorite collection of Bonnie's yet and that's really saying something because I'm a huge fan of her sweet, nature inspired style. Since I love this collection so much, I've lined up a special Giveaway with Brooke of Lady Belle Fabric for tomorrow and I sewed up the prettiest bag using my own The Open Road bundle yesterday in anticipation of our BIG Giveaway!

IMG_0444

For my bag I chose twelve of the sixteen prints that make up this collection, sticking with the floral and blender prints in colors including navy, sweet pea greens, sunny yellows and peachy pinks!

IMG_9315

A while back I stashed a fifteen yard roll of Dritz 1 1/4" Cotton Belting in Natural that's been so great to have on hand for the drawstring style bag with handles that I made yesterday and for several tote bags I've made since I discovered this product. If you're into bag making, I highly recommend stashing some, too!

IMG_9317

I've made a few of these drawstring bags with handles this month, but this is the first I've been able to photograph to share before I gift or sell it. I simply cut a 2.5" x 18" strip from each 1/2 yard cut and I used my Quick Quilt As You Go technique with a layer of Hobbs Tuscany Cotton Batting to piece together the front and back of the bag. I did add additional wavy quilting for some soft texture using a very pale minty green Aurifil. So pretty!

IMG_9329

IMG_9318

To make the drawstring ties I used a long scrap of AGF's Lovey Dobby cotton denim in Evening Lakeview which pairs really nicely with these The Open Road fabrics, especially the one navy print I included.

IMG_9326

IMG_9324

I'm sure I'll be making many more of this style bag to fill my new studio gift shop space with products as I prepare for opening. I think these make a great gift and will be perfect for carrying those portable knitting, crochet or epp projects, don't you think?

I hope this project inspired your own The Open Road sewing! Be sure to stop back here tomorrow and to visit my Instagram for two chances to win this amazing collection!

xo Maureen

Tuesday, July 30, 2019

A Summer Bag for Sharon Holland's Everlasting Blog Tour!

Today I'm excited to share my project for my talented friend, Sharon Holland's Everlasting Blog Tour!

IMG_9172

Everlasting Blog Tour

Sharon is a dear friend, who I've mentioned quite a bit here on the blog as we've co-hosted a few different events together, and she's also a fellow Art Gallery Fabrics designer. Everlasting is her seventh fabric collection, full of romantic, summer-inspired prints with a classic palette of navy, red, turquoise, and blush. It's so pretty!

Everlasting by Sharon Holland rolls

I had the pleasure of sewing up a few different samples for the Everlasting LookBook back in May and for this blog tour project I chose several of my favorite Everlasting prints to make a variation of this Summer Bag using my go-to Quick Quilt As You Go and I love how it turned out!

IMG_9153

Following the Summer Bag pattern, I used the same size blocks that are suggested only I had I to use different size pieces of Everlasting fabrics since I was working with what I had left from making the LookBook projects. Using qayg, I densely stitched each fabric to a cushiony layer of Hobbs Tuscany cotton batting with a pretty turquoise Aurifil 50wt, assembled the bag according to the instructions with just slightly wider bag straps, and then I finished with a lining made in my pretty Sun Kissed Canvas!

IMG_9156

This pattern makes a HUGE tote-style bag that is perfect for Summer outings! The extra quilting, layer of batting, and canvas lining make this a sturdy bag while keeping it still very soft. I just LOVE how good Sharon's Everlasting fabrics are for quilt as you go patchwork!

IMG_9128

I hope you're inspired by my stop on Sharon's Everlasting Tour! It's such an honor to be amongst this amazing line up of designers:

THE EVERLASTING BLOG TOUR SCHEDULE

Friday, July 12 - Sharon Holland
Monday, July 15 - Marija Vujcic
Tuesday, July 16 - Carolina Moore
Wednesday, July 17 - Dana Willard
Thursday, July 18 - Lisa Ruble
Friday, July 19 - Dritz Sewing
Monday, July 22 - Eleri Kerian
Tuesday, July 23 - Marisa Wilhelmi
Wednesday, July 24 - Sharon McConnell
Thursday, July 25 - Modernly Morgan
Friday, July 26 - Alexis Wright
Monday, July 29 - Priscilla Geissler
Tuesday, July 30 - ME
Wednesday, July 31 - Elina Temmes
___________________

IMG_9161

xo Maureen

Monday, March 4, 2019

Aura Blog Party!

Hello, friends! I've been meaning to pop in here to explain why I haven't been blogging much so far this year. Long story short, I dedicated the entire month of January to working on my fabric collections for Art Gallery, and then the day before I was to get back to sewing and sharing here, I injured myself pretty good! I was jumping on a trampoline, came down wrong and ended up badly spraining the ligaments in my right knee and completely tearing my ACL. It's been rough! I'm on crutches and in a leg brace to heal the sprains so I can have ACL reconstruction surgery on March 21st, and then after the surgery there will be a couple of month's recovery time. Today is one month since the injury and still, the two things that bother me the most are stairs and sewing. Most of the day is spent elevating my knee and icing it because it's still very swollen.

As a way to stay creative during this injury, I set a goal for myself to make at least one bag a day. Most days I've been able to, some days I cannot and other days I have made two! This small goal has helped me stay positive and productive during this difficult time! You're welcome to join me in making a new bag anytime and can follow along on my Instagram @MaureenCracknell and the hashtag #MCHbagchallenge!

So here I am, finally back today and excited to share my project for my talented friend, Mathew Boudreaux aka Mister Domestic's Aura Blog Party!

Mister Domestic's Blog Party!

Mister Domestic's Aura

Mathew AKA Mister Domestic is an Angles by AGF designer and Aura is his second fabric collection, inspired by a trip that he and his daughter Helena took to Hawaii!

For my blog party project I chose several of my favorite Aura prints in vibrant yellows, coral and purple and I made one of my quilt as you go flat bottom lined zipper pouch bags and I love how it turned out!

Friendship Braid Zipper Pouch in my Aura favorites!

The front side is made up of 1.5" strips of Aura and the friendship braid Quick Quilt As You Go pattern that I share a tutorial for here --  Friendship Braid QAYG. This bag has a cushiony layer of Hobbs Tuscany cotton batting, a colorful zipper, and is lined with a pretty Aura print!

The back is a simple striping of the same fabrics that I chose for the front. This collection is so good for quilt as you go patchwork!

Aura Zipper Pouch Bag

I hope you're inspired by my stop on Mister Domestic's Aura Tour! It's such an honor to be amongst this amazing line up of designers:

MISTER DOMESTIC’S AURA BLOG PARTY

Monday February 11: Amanda Woodruff of A Crafty Fox
Tuesday February 12: Kylie Gersekowski of Little Moo Designs
Wednesday February 13: Sharon Holland
Thursday February 14: Kim Niedzwiecki of Go Go Kim
Saturday February 16: Sarah Maxwell of Fearless with Fabric
Sunday February 17: Natalie Santini of Hungry Hippie Sews
Monday February 18: Carolina Moore of Always Expect Moore
Tuesday February 19: Isabelle Selak of South Bay Bella Studio
Wednesday February 20: Elizabeth Chappell of Quilters’ Candy
Monday February 25: Tara Curtis of Wefty Needle
Tuesday February 26: Monica Tetteh of That’s Sew Monica
Wednesday February 27: Nicholas Ball of Quilts from the Attic
Thursday February 28: Lucy Brennan of Charm About You
Friday March 1: Robbin Flockhart of Sew Farm Quilter
Saturday March 2: Evie Jespersen of EV Quilts
Sunday March 3: Kelly Liddle of Jeliquilts
Monday March 4: ME of Maureen Cracknell Handmade
Tuesday March 5: HollyAnne Knight of String and Story
Wednesday March 6: Mimi Goodwin of Mimi G Style
Thursday March 7: Angela Wolf of Fashion Sewing with Angela Wolf
Friday March 8: Kitty Wilkin of Night Quilter
Saturday March 9: Sharon Burgess of Lilabelle Lane Creations
Sunday March 10: Emily Dennis of Quilty Love
Monday March 11: Sheri Cifaldi-Morrill of Whole Circle Studio
Tuesday March 12: Elina Temmes of Elina Temmes
Wednesday March 13: Jennifer Strauser of Dizzy Quilter
Thursday March 14: Saija Kiiskinen of Saija Kiiskinen
Friday March 15: Brittany Jones of Brittany J Jones
Saturday March 16: Jodi Godfrey of Tales of Cloth
Sunday March 17: Kim Niedzwiecki of Go Go Kim
Monday March 18: Sharon McConnell of Color Girl Quilts
___________________

I hope to finish up a second bag just like this one for tomorrow's bag of the day, and I'll be sending these two off to Mathew & Helena!

Loved To Pieces + Aura

xo Maureen

Friday, September 21, 2018

Autumn Vibes Friendship Braid Tutorial : :

IMG_6083 (833)

This project tutorial is a Quick Quilt As You Go style quilt, made with long panels rather than traditional blocks. We'll be using cotton batting as our foundation for easy string quilt piecing. I think you'll be very surprised with just how simple and quickly this method of quilting comes together, especially those of you who have taken my Crafty class, Quick Quilt As You Go!

Fabric and Materials Required : :
  • a variety of fabrics totaling 7.5 yards cut 3" x wof (suggested) or cut into 3" x 12.5" ( I used approximately 250 pieces, using nineteen different prints from a half yard bundle of my Autumn Vibes collection)
  • 5 - 13" x 74" panels (I cut mine slightly larger than trim to size after fabrics are added) of Tuscany Cotton a 100% cotton batting by Hobbs Quilt Batting 
  • thread & sewing pins
  • fabrics for quilt backing (4.5 yards) and quilt binding (1/2 yard cut into 7 strips 2.5" x wof )
  • rotary cutter/large cutting mat/ruler set
* Notes for Quick Quilt As You Go *  
  • Synthetic batting is NOT suggested, only use a 100% cotton or natural fiber batting, such as silk, bamboo or wool. It is important to be able to press the batting with a hot iron and steam
  • Use a standard loft batting. The #1 question I receive about this QAYG is folks wanting to know if there is bulk at the seams. My answer is NO, not to a noticeable degree. I absolutely wouldn't spend my sewing time making a quilt that was poorly constructed or that wasn't comfortable!
  • Quilt panels can be made in any size! The measurements I'm sharing for this tutorial makes a 60" x 72" throw size quilt. Please feel free to adjust that to your own desired length and width.
  • To get the look of my quilt, use Autumn Vibes By the Chimney to make three panels and Autumn Vibes Fresh Night Breeze to make two panels, then alternate the panels when you sew them together

IMG_5957

Now, let's get started!  
    .   .   .   .   .   .   .   .   .   .   .   .   .   .   .   .   .   .   .   .   .   .   .    .

Preparing the Batting Panels:

1. To make the batting panels for the foundation piecing, cut 5 - batting strips measuring 13" x 74". I make mine slightly oversized for a little extra wiggle room and then I square them to 12.5" x 72" once they are pieced with fabric strips

IMG_5856

2. Place one batting panel on the cutting mat at a time, matching one of the long edges to the horizontal grid on the mat. With a ruler matched up as shown in the photo below, mark one line from the corner that's about 7" long to help start the proper angle when adding the first fabric strips. Once those first fabrics are added, you'll keep that angel naturally as you piece. Repeat this step making sure you mark all five batting panels with this line to use as your starting guide

IMG_5894

Adding the Fabric Strips:

3. Prepare the fabric strips by cutting fabrics into 3" x WOF strips and trim away the access length as you add the fabrics for less waste OR subcut the WOF strips into 12.5″ strips. For this quilt I used approximately 250 strips measuring on average 3" x 12.5" with a few measuring less in length for the beginning and end of my panels where that much length isn't necessary. I cut my 3" x WOF strips from a 1/2 yard bundle of Autumn Vibes, minus the Foxes in Fall print. You will need a total of 7.5 yards of fabrics for this 60" x 72" throw quilt top

IMG_5843

4. Using that first mark as your guide, begin by placing that first fabric right side up onto the batting, then place the next strip right side down onto that first strip, matching up the edges. Using a 1/4" seam allowance, sew along the raw edge. Since you're sewing the fabrics to the batting as your foundation, you'll be permanently setting the fabric strips in place

IMG_5896

img_5899

5. Fold over the top fabric strip and either press with iron or you can simply smooth it down flat with your hand. The fabrics stick nicely to the cotton batting, therefor I'm comfortable carefully folding over the fabric strips and just smoothing them with my hand as I go and pressing with a hot iron just a few times while I work my way down the panel

IMG_5902

6. Continue adding fabric strips, placing each new fabric strip on top of the other with right sides facing, matching up the raw edges. Attach with 1/4" seam, fold over, and continue to press or smooth each new fabric added until you reach the end of the batting


IMG_5904

IMG_5906

7. After you've completed that starting point to anchor the first braid, you'll sew your first braid to the right side of those first fabrics, placing a new fabric strip with right sides facing, matching up the raw edges as shown below. Attach with 1/4" seam, fold over, and smooth with hand to press

IMG_5907

IMG_5910

8. Continue sewing strips to the left and then the right of the braid. Match the fabric strips from the center each time

IMG_5920

Below you can see how I kept the WOF length to my fabric strips and trimmed away the access length as I added each new strip.

img_5921

9. When finished with a panel, press well. Use a mat, ruler, and rotary cutter to trim away the overhang of fabric from each side of the panel and square up to measure 12.5" x 72". Repeat until all 5 panels are trimmed to size

IMG_5861

IMG_5930

IMG_5862

Sew Panels Together:

10
. Take two panels and place them rights together. Using sewing pins to secure their place and sew along one side keeping a 1/4" seam allowance. Repeat this with the remaining panels to create your Friendship Braid quilt top

IMG_5933

IMG_5871

11. Press the seams open on the back side and press the front side of each panel well

IMG_5892

IMG_5957

Quilt Backing, Basting and Binding:

12. Piece together fabrics for the quilt back to measure at least 2" bigger than the quilt top on all sides and baste it to the quilted quilt front.  I use Therm O Web's SpraynBond basting spray for this, however pin basting works

IMG_5963

IMG_5970

IMG_5966(942)

13. For a simple finish: Working your way down from the top of the quilt to the bottom, simply sew about 1/4" from the seam lines (when adding this stitching it IS recommended that you do use a Walking Foot). Continue this on both sides of each seam running from the top of the quilt to the bottom, to attach your quilt backing fabric

I chose to attach my quilt back and add my final quilting by using the built-in wavy quilt stitch that comes with my Janome.
________________

Below shows a close up look from a previously made Quick Quilt As You GO of what the simple stitches will look like from both the front and the back side of the quilt

Close up -- Front

Close up -- Back
__________________

Below you can see an up close look at how the wavy quilting stitches look.

IMG_6094

14. Machine or hand bind the quilt using your preferred method

IMG_6098

IMG_6100

Hooray! Your Autumn Vibes Friendship Braid QAYG Quilt is finished!

IMG_6085

IMG_6067

IMG_6045

Thank you so much for stopping by today and for all the love you've already shown my Autumn Vibes fabric collection here, on Instagram and on Facebook! I really hope you enjoy this tutorial!

Do you think you'll give it a try

If you do, please be sure to share with the hashtag #FriendshipBraidQAYG, there you can see examples of many other projects using this pattern, and be sure to tag me @MaureenCracknell so I can see!

xx Maureen